• Facebook
  • Yelp
  • Google+
[reviewstream]

Author: Anita Gaal

  • Mercedes Oil Pressure Switch

    Impacts of Oil Pressure Switch Failure in Your Mercedes

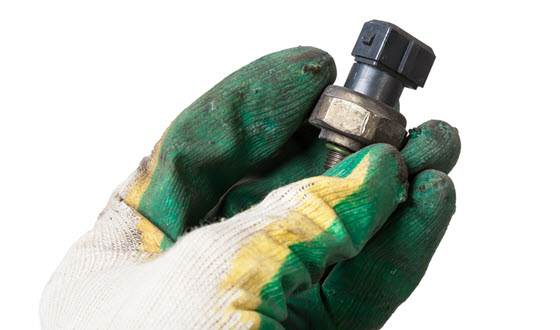
    The oil pressure switch is one of the critical components that guarantee the health of your engine. This small but important unit is responsible for checking the state of oil pressure in the engine and sending signals to the dashboard if there are any problems. But what happens when the oil switch fails? Let’s find out!

    What is the Function of the Oil Pressure Switch?

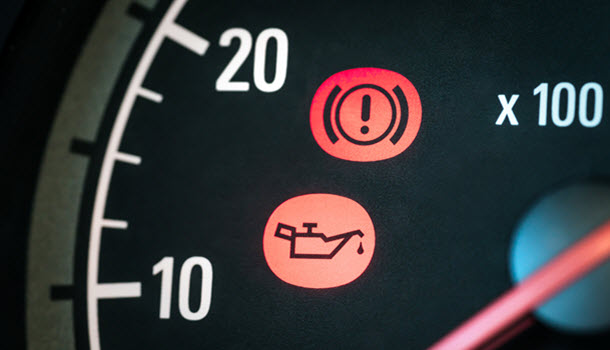
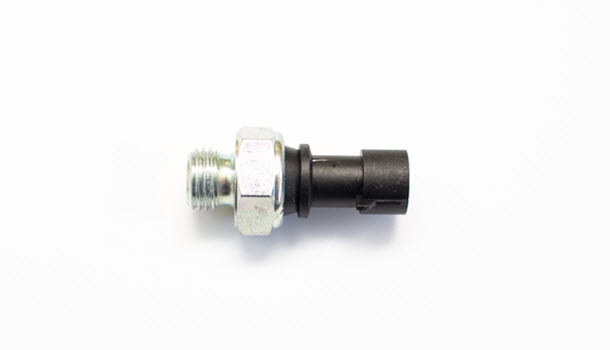
    This switch is sometimes known as the oil pressure sensor. It is a device that is meant to detect the pressure of oil within the engine. The correct pressure of the oil is paramount since it will guarantee that all the components of the engine are well protected from friction and damage. When the oil pressure is low, the switch turns on a light on the dashboard giving you a heads-up that something may be wrong. This warning affords you the opportunity to fix the problem before it becomes worse and affects the engine.

    Symptoms of a Faulty Oil Pressure Switch

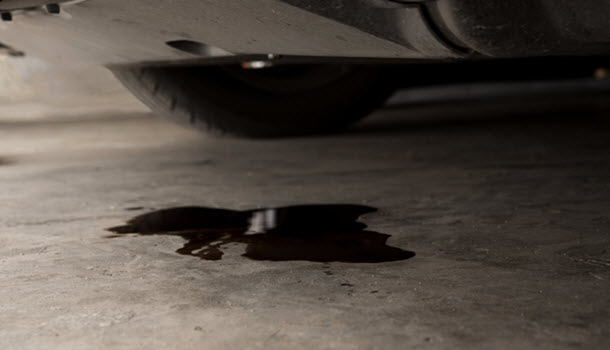
    • Engine Damage: There are many dangers associated with a bad oil pressure switch but the most dangerous of them is severe engine damage. If this switch does not alert you of low oil pressure, the engine parts may get inadequate lubrication. This leads to increased friction which generates more heat, and at the end of the day, the engine might seize. It is very costly and time-consuming to repair or replace a seized engine.
    • Reduced Engine Lifespan: Even if the engine does not seize, driving your Mercedes with low oil pressure decreases the engine’s useful life. Failure to lubricate the engine adequately results in the wearing out of the components and early failure. This will lead to more constant repairs of the engine, as well as a decreased total life expectancy for your engine.
    • Increased Repair Costs: If the oil pressure switch is not given attention, it will result in a series of complications. A problem that may begin as a minor one with a small amount of money to be spent to correct may snowball into a huge one if not corrected on time. It is much cheaper to replace an oil pressure switch than to fix the engine that has been affected by low oil pressure so make sure you deal with the problem at an early stage.

    Preventing Oil Pressure Switch Problems

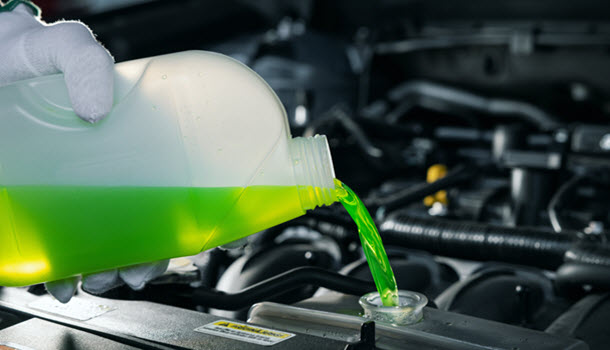
    • Regular Maintenance: To avoid having your Mercedes’ oil pressure switch fail, the best thing you can do is to stick to the recommended maintenance schedule. By doing regular oil changes and inspections, you will be able to know whether your oil system is in good condition.
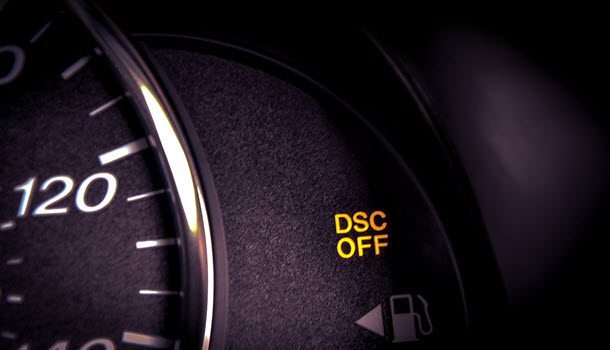
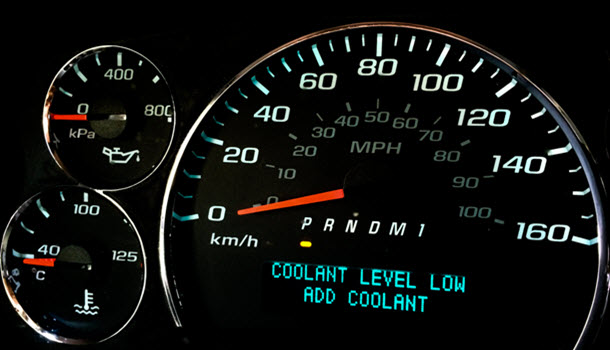
    • Address Warning Lights: Whenever you see the oil pressure light on or blinking, do not ignore it. It may not appear as a big deal, but it is always wise to be safe than sorry. A faulty oil pressure switch is a bad sign; if you can correct the warning signs, you can avoid more significant issues later on.

    What to Do If You Have Suspicions of Oil Pressure Switch Failure

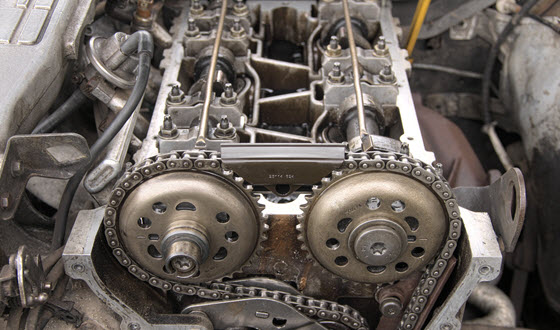
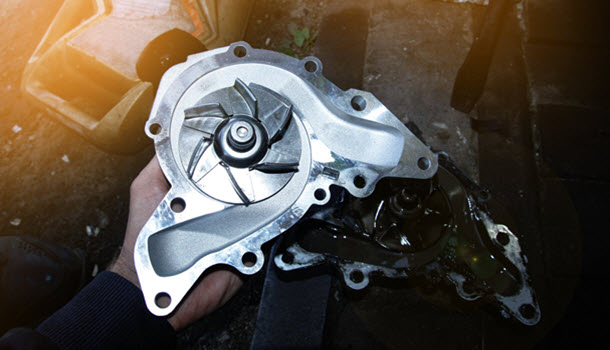
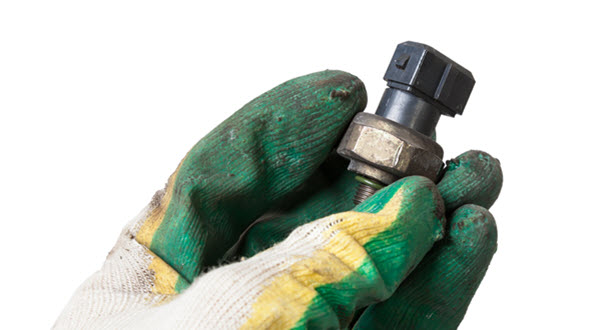
    If you observe any of the signs described above, then it is advisable to take your Mercedes to a professional mechanic for diagnosis. A professional can tell whether the oil switch is the cause of the problem or not after he/she examines the vehicle. If the switch is due for replacement, you should do so without wasting time as this will help to avoid more severe problems with the engine in the future. Besides, the mechanic can also look at the oil filter and oil pump to ensure that they are in good condition.

    Mercedes Oil Pressure Switch Check

    We Can Take Care of Your Mercedes by Performing Routine Services

    At Euro Automotive, we are the auto shop of choice in Dallas, TX, and we have been dealing with maintenance and repair services of Mercedes and other European vehicles for over 20 years. Our skilled staff is ready to attend to all your automotive needs, as basic as oil change or as complicated as the failure of the oil pressure switch. Aside from Dallas, we also assist drivers from Arlington, Garland, and Fort Worth, TX. If you feel the oil pressure system has issues, don’t wait, call us now to get an estimate and ensure your Mercedes is running smoothly.

  • Volvo No Oil Pressure Warning

    What to Do When You Get A No Oil Pressure Warning in Dallas

    Have you been receiving a “No Oil Pressure” warning from your Volvo? This can be very worrying since oil pressure is very vital for the well-being of your engine. When there is no sufficient oil pressure in your Volvo, the engine parts may deteriorate at a fast rate or undergo severe failure because there is not enough oil to lubricate engine components. Continue reading to find out more about how you can solve this problem.

    What Does the “No Oil Pressure” Display Mean?

    The “No Oil Pressure” light is a special warning sign that your Volvo’s engine is not receiving enough pressure from the oil. Engine oil pressure is important because it helps to lubricate parts of the engine, lessen the amount of friction, and prevent overheating. If you do not maintain adequate oil pressure, your engine is likely to be damaged badly within a short time.

    Top Reasons Why The “No Oil Pressure” Warning Comes On

    • Low Oil Level: Low oil level is one of the most basic and frequent causes that can result in no oil pressure warning. When there is not enough oil in the engine, the oil pump cannot create enough pressure to supply the engine.
    • Faulty Pump: The oil pump is to circulate the oil in the engine so that it can play the required role. When the pump fails, the pressure in the oil will reduce and the warning lamp will be lit.
    • Clogged Filter: An oil filter is used to help in filtering out impurities in the engine oil. Unfortunately, it is not uncommon for the filter to get dirty and eventually narrow the opening through which the oil can pass as well as the pressure.

    Measures to Take When You Get an Oil Pressure Warning

    • Check Oil Level: First of all, you should check if there is enough oil, but make sure the car is parked on flat ground when doing so. With a dipstick, you will be able to determine the level of the oil. If it is low, pour the recommended type of oil for your Volvo into the engine. The owner’s manual is the best source of information on the type of oil that should be used and the right specifications. After adding oil, check the level again to see if it is within the recommended level or not.
    • Inspect for Oil Leaks: Look around the engine to see if there are any oil stains. Try to find the oil stains or any wet and oily area under the car and around the engine bay. If you discover a leak, it will have to be repaired so your engine can build up the correct oil pressure. The typical leak sites are the oil pan, valve cover gasket, and oil seals.
    • Replace Oil Filter: If the oil level is okay and yet the warning is still appearing, then the oil filter might be blocked. The oil filter should be replaced so that the oil can flow and gain the right pressure it needs. Ensure that you also use a high-quality oil filter that would be appropriate for your Volvo model.
    • Test Oil Pressure Sensor: If you have checked the oil level, added oil, and even changed the filter, and the warning is still on, then it is most probably the oil pressure sensor that is causing the problem. The sensor can be calibrated with the help of a pressure gauge. If the sensor is determined to be damaged then it should be changed.
    • Check the Oil Pump: If none of these is the issue, then maybe it is the oil pump that is causing the problem. A faulty oil pump won’t be able to pump oil well resulting in low oil pressure. Diagnosing and replacing an oil pump is also a little complex and might need the help of a professional.

    Volvo Oil Pressure Sensor Test

    Come To The Most Trusted European Car Repair Shop in Dallas

    Since our establishment, Euro Automotive has been the go-to auto shop for popular European cars such as Audi, Mercedes, Mini, BMW, Porsche, Jaguar, Rover, and Volvo in Dallas, TX. Our experienced mechanics also help drivers from neighboring cities such as Garland, Arlington, and Fort Worth.

    Whether you just need your Volvo to be checked, diagnosed, or want a major repair, we offer excellent service. Schedule an appointment today and our mechanics will handle all your Volvo worries.

  • Jaguar Window Regulator Switches

    Top Dallas Service Center for Jaguar Window Regulator Problems

    Have you ever wanted to roll down the window of your Jaguar only to realize that it has jammed? This is a common problem that may be caused by a malfunction of the window regulator of your car. A window regulator is a part of the automobile interior that is used to control the movement of the window. It is attached to the window motor to control the raising and lowering of the window. Over time, this component can fail. Let’s discuss how you can address this issue to maintain your Jaguar in good condition and where to seek servicing.

    Common Symptoms of Failed Window Regulator

    If your window is stuck at a certain position and cannot be closed or opened, then it is high time you checked the window regulator for failure. At times you may also find that when you attempt to open or close the window there are grinding or clicking noises, this is a clear sign of a faulty regulator. Also, if the window takes a long time to open or close or if it shakes irregularly as it opens or closes, then this could be an indication that the regulator is faulty.

    How to Tackle Window Regulator Failure

    Inspect the Window Operation

    First, try to open the window and see how it behaves. Is the window difficult to open, slow in its motion, or does it get stuck along the way? Check for any abnormal sounds like grinding or clicking. This initial inspection can give some hints as to what may be wrong with the window regulator.

    Remove the Door Panel

    To get to the regulator, you will have to take off the door panel. Start by identifying and unscrewing any screws that are used to attach the panel. Then, gently remove the panel using a flat-edged tool. Handle them carefully so as not to damage any component. It is advisable to consult the manual of your car to get the specific details concerning your vehicle.

    Examine the Regulator and Motor

    When the door panel has been removed, you will be able to see the window regulator and motor. Check for signs of wear and tear such as cables that are frayed or parts that are broken. Also, ensure that the electrical connections are properly connected and that there is no sign of corrosion. If there are any broken parts, they will most probably require replacement.

    Test the Window Motor

    You can use a multimeter to check if the window motor is getting power. To do this, plug the multimeter into the motor terminals. If the multimeter indicates that the motor is not receiving power, there could be a problem with the wiring or the electrical system. However, if the motor is getting power but is not running, then the motor may just require replacement.

    Replace the Window Regulator

    If you are sure that the window regulator is bad, then it is time to replace it. Begin by removing the old regulator from the car window and the door frame. After the old regulator has been removed, place the new regulator in the correct position. Bolt it down and ensure that all the connections are properly tightened and aligned.

    Reassemble the Door Panel

    After the new regulator is installed, check the window to ensure that it opens and closes quietly and without any difficulty. If all goes well, refit the door panel. Put it back in carefully until the clips click into place, and then replace the screws that you took out.

    Let A Professional Replace Your Jaguar Regulator

    Jaguar is a luxury car and should not be fixed by anyone who is not trained for the job. As a Jaguar owner, make sure you take your car to a reliable mechanic when you notice any issues. Trying out a DIY repair on this luxury is not recommended as it can lead to more expensive issues.

    Jaguar Electric Window Mechanism Motor

    Visit Our Garage At Euro Automotive For Your Jaguar Needs

    Welcome to Euro Automotive, your automobile specialist for servicing popular European vehicles in Dallas and the surrounding cities such as Garland, Arlington, and Fort Worth. Our garage has a dedicated team of mechanics who treat our customers’ cars in the way that they would treat their own. When you entrust your Jaguar to our shop, our technicians will ensure the faulty window regulator is repaired and other problems with the car are dealt with. For any kind of repair, you can call us at 214-956-7744.

  • Jaguar XF Front Wheel Bearing

    Get Your Jaguar XF Front Wheel Bearing Fixed in Dallas

    Curious to know why your Jaguar XF car tires are wearing out unevenly? The problem could be a front wheel bearing. Not only does this impact your driving experience but in the long run could result in severe damage if not attended to. Here is what you should know about getting your Jaguar front wheel bearing repaired to gain a smooth and safe driving experience.

    What Does the Wheel Bearing Do?

    The front wheel bearing is among the essential components in your Jaguar XF wheel assembly. It enables the wheel to rotate with ease and with very little resistance. Wheel bearing is the part of the car that bears the weight of the car and also absorbs the force exerted on it by the roads. Over time, it is subjected to normal wear and tear and as such becomes worn out and this leads to various problems.

    Fixing the Wheel Bearing

    • Diagnosis: The first thing to do is to ensure that the wheel bearing is the cause of the issue at hand. A professional mechanic will visually examine your vehicle, listen to the sounds it makes, and feel for any looseness in the wheel to determine if it is truly faulty.
    • Removal of the Wheel: Once the problem is confirmed the mechanic will have to remove the front wheel to get access to the wheel bearing. To remove the wheel, you have to first unscrew the lug nuts and then use a jack to raise the car off the ground.
    • Access Wheel Bearing: After the wheel has been pulled off, the mechanic will have to take out the brake caliper and the rotor and get to the wheel hub assembly. The wheel bearing is found in the hub assembly part of the wheel.
    • Replace Wheel Bearing: The worn-out wheel bearing will be pulled out of the hub assembly. The mechanic will then replace a wheel bearing and make sure it is fully seated and locked into place.
    • Reassemble and Test Drive: When a new wheel bearing has been sourced, the mechanic will then re-insert the brake rotor and the caliper before putting the wheel back on the car. The lug nuts will be tightened to the manufacturer’s recommended torque. Once the repair is done the mechanic will drive the car to ensure that the new wheel bearing is working as it should, and there is no sound or vibration from the wheels.

    Preventive Maintenance

    Wheel bearings can develop problems due to normal wear and tear, but there are measures that you can take to ensure that the wheel bearings last longer. Preventive measures such as maintenance and inspection may help to avoid these issues from arising in the first place. It is recommended that while getting your Jaguar serviced, you should also get your wheels and suspension system inspected. Do not forget to check tire inflation and alignment since this can help in the reduction of stress on the wheel bearings.

    Choosing the Right Mechanic

    When it comes to repairing the front wheel bearing of your Jaguar XF, it is advisable that you get the services of a professional mechanic. Ensure that you find a mechanic who has specialized in Jaguar cars and who is reputable. They have all that is needed for accurate diagnosis and correct repair of your Jaguar wheel issues. You can talk to friends or relatives who can recommend a mechanic or you can search the Internet to find out more about him.

    Jaguar XF Regular Wheel Alignment Check

    Book Your Next Jaguar Service With The Leading Shop In Dallas

    Welcome to Euro Automotive, the premier source for luxury European car services and repair. We are based in Dallas, TX, and have been providing our services for more than 20 years. Our professional mechanics focus on Jaguar, BMW, and other European car brands.

    If your Jaguar XF has front wheel bearing problems, then you can be sure that our team will diagnose and repair the problem, bringing back your car to its best-performing status. We also attend to drivers from other areas such as Garland, Arlington, and Fort Worth in Texas. When you are ready for your next Jaguar service, reach out to us at Euro Automotive.

  • MINI Crank Seal Oil Leak

    Risks of Ignoring a Crank Seal Oil Leak in Your Mini

    Are you seeing oil stains near your Mini and wondering if it is something to be worried about? Well, you should, regardless of where the leak is coming from. If the source of that leak is the crank seal, ignoring it will lead to serious consequences. Below are some of the consequences of not fixing a leak from the crank seal and where you should go to fix this problem in your Mini.

    How Crankshaft Seal Works

    The crank seal, sometimes called the crankshaft seal, is one of the essential parts of your Mini’s engine. It is located both at the front and rear of the crankshaft and it helps to seal the oil or stop it from leaking out of the engine. This seal also helps to keep the oil safe from dust out and other particles allowing the engine’s moving parts to glide over each other with minimal friction. With time, the seal can become weak, crack, or get damaged and this leads to oil leakage.

    Signs That You Have a Crank Seal Leak

    One of the easiest ways to identify a leaking crank seal is by checking for stains of oil in the vicinity of your Mini; such leaks normally happen at the front or the rear of the engine. If you often have to add oil to your Mini this may be another indication of an oil leak. Checking your oil level occasionally can also help you detect if your car is leaking oil or not. Sometimes, an oil leak can be spotted when it gives a burning smell after touching hot parts of the engine.

    Consequences of Overlooking a Crank Seal Leak

    • Engine Damage: If a crank seal has a leak and is left unattended, then the oil level will deplete due to the leakage and this will lead to an increase in friction and overheating. This can further result in serious damage to the engine in which case you might have to do a total overhaul of the engine.
    • Reduced Performance: When the level of oil in an engine is low, it will not be able to operate at the optimal level. You may notice that the engine power is low, acceleration is slow, and fuel economy is affected.
    • Increased Repair Costs: The longer you turn a blind eye to an oil leak, the worse the situation becomes. While a seal replacement may appear to be a straightforward job, it can become complicated if you have ignored the problem for so long. The possibility of having other parts like belts and hoses damaged because they were soaked in oil for too long increases.
    • Safety Hazards: Oil spills can make the ground slippery so it is very dangerous to you and other road users. It is important that your Mini is leak-free to avoid jeopardizing road safety.

    How To Stop Leaks In Crank Seal

    • Identify the Source: The first thing that one should do when he or she realizes that there is an oil leak is to try and locate the source of the problem. A competent mechanic will be in a good position to diagnose and pinpoint the area of the leak before repair is done.
    • Replace Seal: After the source of the leak has been found, one will have to change the crank seal. This means pulling out parts around the crankshaft to get to the seal. To increase the lifespan of the seal it is important to use high-quality parts.
    • Check for Additional Damage: When making the repair it is advisable to assess if there is any other damage that the leak may have caused. This also involves checking on the belts, hoses, and other parts of the engine which could be damaged by the leaking oil.
    • Preventive Maintenance: Once the leakage problem has been solved, routine maintenance should be conducted to avoid a repeat of such a problem. This involves things like oil level and seal inspections.

    MINI Crank Seal Repair

    Schedule A Mini Inspection With The Expert Mechanics in Dallas

    Here at Euro Automotive, we have a team of experienced technicians who can help to diagnose the reason your Mini is having oil leak issues and fix them to keep your engine safe. Our company is based in Dallas, TX, so we can offer professional service to drivers from nearby places like Arlington, Garland, and Fort Worth, TX. If you have any reason to believe that your Mini has a crank seal leak, then it is best that you do not wait until it gets worse. Book your next service with us now.

  • Blue Mercedes-Benz Car

    Plastic Guide Rail Repairs in Dallas For Your Mercedes

    Is your Mercedes making strange engine noises or are you experiencing performance problems? It might be best to check if your car’s plastic guide rails are okay. These small engine parts are very important in the operation of the timing chain system, and when they break, they can make your Mercedes engine go out of sync. Let’s start with what plastic guide rails are and how to know when they are failing before looking at how you can resolve this problem.

    What Are Plastic Guide Rails?

    Plastic guide rails are one of the smallest components of a Mercedes engine. They are responsible for guiding the timing chain by ensuring it stays in the exact position and receives the right amount of tension.

    Even though guide rails are built to be strong, they are made of plastic and will definitely degrade as you use them due to the heat, pressure, and vibrations they are exposed to in the engine. When this component fails, your Mercedes timing chain will lose its tension and it might not be able to power the necessary engine accessories.

    Signs of Failure

    • Engine Rattling: Guide rail failure is often marked by a rattling sound coming from the engine. This noise occurs when the timing chain becomes slack and starts to hit other parts of the engine.
    • Engine Misfires: A malfunctioning guide rail can cause timing chain problems such as engine misfires. In the worst-case scenario, the guide rail failure can cause the timing chain to jump teeth or skip, which will result in the overall engine performance loss.
    • Check Engine Light: If your Mercedes-Benz’s onboard diagnostics system recognizes timing-related problems, such as timing chain slack, the check engine light on your dashboard may turn on.

    How To Tackle Guide Rail Failure

    • Diagnosis: The first step to take to tackle plastic guide rail failure is correct diagnosis. A Mercedes specialist or qualified mechanic will do a complete inspection of the components in the timing chain system such as the plastic guide rails, tensioners, and sprockets. This inspection can be done in two ways. Your mechanic might decide to either do a visual inspection of the mentioned components or run a diagnostic to get the stored trouble codes from the engine management system.
    • Replacement: If the plastic guide rail proves to be faulty, it will need to be replaced. Guide rail replacement usually involves the dismantling of the timing chain cover, timing chain, and any other components preventing the guide rail from being exposed to repairs. The old guide rail is then removed and a new one is set in its place. This replacement must be done by a mechanic so that you can be sure it is correctly aligned and fitted.
    • Inspect Other Components: When you replace the plastic guide rail, you should also check other parts of the timing chain system to see whether they are worn or damaged. There are a number of parts you can check some of which are the timing chain tensioner, sprockets, and the timing chain. Any worn or damaged part should be replaced to avoid problems in the future.
    • Regular Maintenance: To avoid plastic guide rail failure and other timing chain problems, it is necessary to adhere to timely maintenance of your Mercedes. This servicing should be done by professional mechanics who understand how your Mercedes was designed to work.

    Mercedes Plastic Guide Rail Failure Fix

    Schedule Your Mercedes Repair And Maintenance With Euro Automotive Experts

    At Euro Automotive, we are proud to be the top choice for luxury European auto service and repair with over 70 years of experience in the auto repair business. Our garage is located in Dallas, Texas, but we extend our services to drivers from the entire state including those in Garland, Arlington, and Fort Worth, TX.

    If you have a rattling noise coming from your Mercedes or you have a plastic guide rail that is misaligned or broken, don’t wait to bring your car to us. Our professional mechanics will carry out a thorough assessment and will make sure to fix any problems that may be causing the Mercedes to be off. Schedule your appointment today by calling 214-956-7744.

    * Blue Mercedes-Benz Car image credit goes to: Artistic Operations.

  • Land Rover DSC OFF Warning

    Tips to Diagnose a Land Rover DSC System Failure

    Land Rovers are popular for their strength and durability. However, they are still subject to wear and aging, especially when they are not well cared for. While any part of a vehicle can easily be affected by aging and continuous use, the Dynamic Stability Control (DSC) System is a common victim for Land Rovers.

    The DSC system, in simple terms, helps to maintain your Land Rover’s stability especially when driving through problematic conditions like slippery roads due to ice, sharp turns, or rough roads. A DSC failure can cause serious problems for a driver and their SUV. Hence, we will discuss tips to help you identify faults in your car’s DSC system.

    Causes of Land Rover DSC System Failure

    Many factors can be responsible for a failure in a Land Rover’s Dynamic Stability Control System. The three most common causes are;

    Faulty Sensors

    The DSC system is highly dependent on a web of sensors that help to gather and transmit information on wheel speed, angle, and acceleration of a vehicle. The information gathered then helps to make adjustments to ensure stability of the SUV. Faulty sensors will provide wrong information and impair the function of the DSC system.

    Lack of Maintenance

    It is not news that vehicle maintenance can keep your vehicle moving for as long as possible. Maintenance includes all parts of your vehicles, even the DSC system. If this system is not properly looked after, it can get faulty.

    Faulty or Low Battery

    Another reason why your Land Rover’s DSC system can fail is when the battery is low or faulty. Once this happens, the DSC system does not have enough power to carry out its functions. This is very common with Land Rovers and you may need an expert’s help to identify this problem.

    How to Diagnose a DSC System Failure

    • Dashboard warning light: The first indication that there is a fault with your Land Rover’s DSC system is usually the DSC dashboard light. The “DSC” warning light comes up on your car’s dashboard showing a fault. Sometimes this light might fluctuate, going on and off. While this light cannot directly show what the fault is, it helps you quickly recognize that something has gone wrong with your car’s DSC system.
    • Loss of traction control: One useful feature of the DSC system is that it helps to maintain a vehicle’s traction. In the case where you start to notice that you are losing traction or stability when driving, your Land Rover might be having a DSC failure. To properly diagnose, you may need to speak with a professional.
    • Weird noises: The sounds that your Land Rover makes can also help to tell the state of your car. If your vehicle makes grinding, knocking, or whirring sounds especially when you apply your brakes or when accelerating, it can be a sign of a DSC system failure. This is usually due to a malfunction in the Anti-lock Braking System (ABS) pump caused by a fault in the DSC, which then causes odd sounds in your Land Rover.
    • Steering issues: As we have identified earlier, the DSC system controls the steering of any vehicle. Hence, if you experience any steering problems when driving your Land Rover, it can be a sign of an even bigger problem with your DSC system. You may require the help of an expert to correctly diagnose the problem.
    • Loss of stability navigating bends: If you notice that you lose stability of your Land Rover when you maneuver through corners or bends, then this can be an indicator that your vehicle’s DSC has failed. You may also experience frequent uncontrolled turns and rolls when you drive through rough roads or slippery bends.

    This usually happens because a faulty DSC cannot properly distribute force to all the wheels, and so the handling of the vehicle is affected.

    Land Rover Battery Test

    The Best Services for Your Land Rover

    The best way to properly diagnose any issue with your Land Rover’s DSC system is to take your vehicle down to our professional’s shop. Euro Automotive is the best option for all your vehicle’s needs, from servicing to replacements, and even fixing your DSC system. Our services cater for the core of your Land Rover’s needs at affordable costs. If you are in Dallas, Garland, Arlington, Fort Worth, or anywhere in Texas, come by and let us give you the best service for your European vehicle!

  • Volvo XC40 Dashboard

    Factors Leading To Volvo Dashboard Failure

    Every driver expects to drive their Volvo without any hitches, but what happens if the dashboard does not work? When you do not have a working dashboard, you are immediately cut off from a lot of information about your car. However, if you understand the reasons why the dashboard is failing, it will be easier to avoid them so that your Volvo will always be reliable. Let’s look at some factors that cause dashboard issues in Volvo.

    What Causes Failure Of Your Volvo Dashboard?

    Electrical Problems

    There are many problems that may cause dashboard failure in Volvos, but electrical problems are among the most prevalent. The functioning of your Volvo dashboard depends on the numerous electrical connections that make it display information appropriately. If there are issues with the wiring, fuses, or connectors, they are likely to affect the dashboard’s operation. As time passes, the wires may develop loose connections or get rusty. Damaged fuses can also interfere with the supply of electricity to the dashboard and this would make it not work well. These are some of the common issues that you are likely to experience with your car’s electrical system; however, you can go for a regular inspection of your car’s electrical system to avoid such problems.

    Software Glitches

    Most Volvo cars produced today have electronic systems that require software to control their operations. At times, these software systems may have issues that make the entire dashboard breakdown. Sometimes the dashboard may show wrong information or not work at all due to software updates, bugs, or compatibility issues. If you believe that the problem is from the software side, it would be wise to consult Volvo for any possible updates. Regular software updates for your car can go a long way in avoiding dashboard issues due to software problems.

    Battery Problems

    The battery is an important component in your Volvo because it supplies power to all the electrical systems in the car, including the dashboard. Weak or a faulty battery can lead to a malfunctioning of the dashboard as it will not be able to power it. Some of the telltale signs that indicate that the battery is weak are; the headlights becoming dimmer, slow cranking of the engine, and the blinker and other dashboard lights blinking and then going off. It is recommended to always check the battery’s health and replace it when needed so that the dashboard remains accurate.

    Moisture and Corrosion

    Water is one of the biggest foes of the electrical system of your car. If water or moisture seeps through the dashboard, it can cause rusting and compromise the electrical systems. This is usually common if you reside in a humid area or if your Volvo has been exposed to water through rooftop leakage or flooding. To avoid moisture problems, keep the car interior dry and deal with any water leaks in the roof. It would be good if you periodically check the area around the dashboard for dampness to identify the issues in question early.

    Faulty Sensors

    Your Volvo requires several sensors to feed accurate data to the dashboard. If one or more of these sensors fail, it can present wrong information to the driver. Some of the usual sensors that can influence the dashboard are the speed sensor, temperature sensor, and fuel level sensor. If you find out that some of the gauges have developed some problems in the way they are functioning, this may be due to a bad sensor and may require replacement.

    Visit a Reputable Auto Workshop

    If you cannot detect the cause of failure yourself, it’s best to take your Volvo to professionals so that they can use their tools and expertise to repair the issues.

    Euro Automotive Is The Number One Repair Shop For Volvo Drivers In Dallas

    At Euro Automotive, we have been offering car repair services for some of the most popular European models in Dallas, TX; namely Audi, Mercedes, Mini, BMW, Jaguar, Porsche, Rover, and Volvo. Our expert mechanics also help drivers from nearby areas such as Garland, Arlington, and Fort Worth in Texas. If you are in need of a regular check-up, a Volvo diagnosis, or major repairs, you can be sure to get the best automotive services from us. Come to us now or call our helpline to consult with us on how to fix your faulty Volvo dashboard.

    * Volvo XC40 Dashboard image credit goes to: y_carfan.

  • Jaguar Low Coolant Warning

    Tips To Detect Coolant Leaks in Your Jaguar

    Do you see puddles under your Jaguar or a coolant warning light blinking on the dashboard? This could be a sign of a coolant leak and you should not ignore it for any length of time. Coolant is important for cooling the temperature in your Jaguar when the engine is running, so when it leaks it can end up causing overheating or engine damage. Spotting a coolant leak is not so difficult. Before the issue turns into something terrible, here are some easy pointers to assist you in locating and fixing coolant leaks.

    Reasons For Coolant Leak

    Coolant leaking in a Jaguar can originate from different parts. The most common causes are seepage of hoses, a broken radiator, worn gaskets (for example, water pump and cylinder head), a burst coolant reservoir, or loose connections. Eventually, these parts may deteriorate as a result of their age, wear, or corrosion, and that may cause leaks. Failure to handle coolant leaks promptly can cause overheating of engines and damage.

    What You Should Do To Spot Coolant Leaks

    • Always Check Your Coolant Level: One of the easiest ways to spot a coolant leak is to create a habit of checking your coolant level frequently. Go to the hood and find the coolant reservoir. It’s a see-through plastic tank with “MAX” and “MIN” markings inside. If the level of the coolant is constantly lower than the “MIN” mark, even after you’ve added coolant recently, it is a clear signal of a leak somewhere in the system.
    • Look Under Your Car: Coolant leaks often will give away their presence through stains or drops of liquid under your Jaguar. Park your car in a different location from where you have been parking and check if there is any sign of coolant under it. Coolant is normally sweet smelling and usually comes in bright colors like green, pink, or orange, which makes it easy to identify. If you see any puddles or stains, try to find out where the leak is coming from.
    • Check Radiator Cap: If the radiator cap is not functioning properly or has a crack, it will not be able to hold the pressure in the cooling system. Visually examine the radiator cap for signs of wear or damage to the rubber seal. If the cap is looking tattered or broken, replace it with a new one to prevent leakage.
    • Inspect Hoses: Your Jaguar coolant system consists of multiple hoses and connections that deteriorate with time, which eventually causes leakages. Check all the visible hoses and connections for any indication of wearing, cracking, or looseness. Pay particular attention to the locations where hoses connect to the radiator, engine, and coolant reservoir.
    • Look for White Smoke or Sweet Smell: If you see white smoke coming from the exhaust or a sweet smell in the cabin it could be an indication that the coolant is leaking. A coolant leak dripping into the combustion chamber can be responsible for white exhaust smoke and a distinct smell of sweetness. If you notice these symptoms, please get your Jaguar checked by a professional mechanic as soon as possible.
    • Perform a Pressure Test: You may have to have a mechanic do a pressure test on your cooling system if you can’t pinpoint the source of the coolant leak. Leak detection is performed by pressurizing the system with the pressure tester which forces the coolant to flow through the weak spots and leak. The test can point out leaks that otherwise would not be visible to the eye during visual checking.

    Seek Professional Help

    If you aren’t sure about the location or how to fix the coolant leak, don’t hesitate to get professional help. A certified Jaguar mechanic will have the required skills and the diagnostic equipment to diagnose and repair coolant leaks correctly. Overlooking a coolant leak will eventually lead to expensive repairs and engine damage, so it is necessary to deal with the problem immediately.

    Jaguar Coolant Filling

    Visit Us At Euro Automotive For Your Jaguar Repairs and Maintenance

    When it comes to repairing European cars, Euro Automotive is your one-stop-shop for the most reliable service. If you suspect a coolant leak in your Jaguar and you need a qualified technician for diagnosis, don’t hesitate to contact us. Our mission is to provide the best service to Jaguar drivers in Dallas, Garland, Arlington, Fort Worth, and the rest of Texas. Do not hesitate to call us by phone or come to our office to schedule your next appointment.

  • Land Rover Old Water Pump

    Warning Signs Your Land Rover Water Pump Needs Replacement

    Driving a Land Rover has got its own charm but this can be short-lived if the engine starts to overheat while driving. There are several underlying issues that can cause this headache for you but prominent among them is a malfunctioning water pump under the hood.

    Yes, you heard it right and many of you might be taken by surprise when coming to know the kind of sticky situation your water pump failure can put you in. Let us have a look at the warning signs associated with water pump failure.

    Coolant Leaks

    The coolant is one of the most important fluids in your Land Rover that is responsible for preventing the engine from overheating by absorbing the excess heat generated during the combustion process. A prominent sign associated with water pump failure is related to a coolant leak from your high-end car.

    You might be surprised to find a puddle of pink or bright red color fluid underneath your vehicle where you have parked it overnight. However, this is coolant that we are talking about and its leakage indicates something is seriously wrong with the functioning of the water pump of your car.

    The water pump plays a stellar role in the proper circulation of coolant throughout the engine and if it is damaged or worn out then the coolant will start leaking from it and accumulate on the ground.

    However, at times you may not find any fluid on the ground because the coolant might have evaporated coming in contact with the hot engine but in that case, you will find a white trail of residue which is leftover coolant.

    Overheating Engine

    Well, let us address the elephant in the room. Nobody would like to see the temperature gauge rising in their vehicle and the same holds true also for your Land Rover. Engine overheating can be tied to many different factors in your car but chief among them is issues with the functioning of the components of the cooling system.

    Now, the water pump is an integral part of the cooling system that helps in pumping the coolant through the engine and if you are encountering an unusual rise in the temperature of the engine then you must have a look at the water pump of your Land Rover.

    The majority of times a leak in the water pump hinders the smooth flow of coolant through the engine and this is why the engine might be heating up. The leak allows ingress of air into the cooling system and this creates a blockage in the flow of coolant.

    Overheating of the engine is a serious issue that shouldn’t be ignored because it has the potential to completely damage your engine if it goes unaddressed for quite some time.

    Unusual Noises

    Generally, while driving your Land Rover under normal circumstances you are never going to hear anything other than the occasional roar of the engine when you press the gas pedal for acceleration. However, with a faulty water pump under the hood of the car, you will come across unusual noise coming from your vehicle.

    You might be surprised to hear a squealing sound coming from under the hood of your vehicle and this is an indication of a bad water pump in Land Rover. The failing water pump produces resistance and this causes the serpentine belt to slap against the pulley leading to the squealing sound.

    Furthermore, the squealing sound is not the only sound you get to hear because of a malfunctioning water pump because at times, you might also get to hear a whining sound coming from under the hood.

    Well, many experts opine that the whining noise is caused due to a damaged serpentine belt but the only way to find the root cause of the problem is by carrying out an inspection of your Land Rover by a professional mechanic who can find the source of the problem.

    Emergence of Steam

    The emergence of steam from under the hood of your car is going to catch your attention promptly because this isn’t normal & signifies something is seriously wrong with your car and needs to be inspected immediately. The majority of times it is seen that steam emerges whenever the coolant comes in contact with the hot parts of the engine.

    Now, this can only happen whenever the coolant leaks from a damaged cooling system component and in this case your water pump might be the culprit.

    Preventive Maintenance Is The Key

    The issues with the functioning of the water pump can completely derail the smooth performance of Land Rover and can leave you stranded in the middle of the road. One of the best ways to deal with the issue is by sticking to the regular maintenance and service schedule of your Land Rover.

    You must refer to your owner’s manual if you are facing any difficulties in finding out the due service date of your vehicle.

    Land Rover Water Pump Replacement

    Get In Touch With Euro Automotive

    Euro Automotive is one of the most sought-after auto repair & service centre in Dallas, TX when it comes to fixing complicated issues affecting Land Rovers. Throughout these years our certified mechanics have earned a reputation of being the best in business by fixing various complex issues affecting European luxury cars.

    Contact us now or call us at Euro Automotive to make an appointment and get your Land Rover fixed without any fuss.

Recent Posts

Categories

Archives

Call Us Today!